I often come across individuals who are unsure about how to safely remove butterfly back earrings. These types of earrings are quite popular due to their secure locking mechanism that prevents them from being easily dislodged. Nonetheless, the compact design of butterfly backs can make them a bit tricky to remove, especially for those who are new to wearing earrings or have limited dexterity.
To remove butterfly back earrings, I make sure my hands are clean to avoid any kind of infection. I start by holding the front part of the earring steady between my thumb and index finger. With my other hand, I carefully grasp the butterfly back between my thumb and index or middle finger. By gently pulling the butterfly back while providing slight resistance with the front of the earring, I am able to ease the backing off of the post. It's important to make sure not to tug or pull too hard to avoid discomfort or potential injury to the earlobe.
Understanding Butterfly Back Earrings
Before we dive into the specifics, it's important to note that butterfly back earrings are a popular and secure option for many earring wearers. Their design allows for easy application and removal, suited for various earring types.
Distinct Features of Butterfly Backs
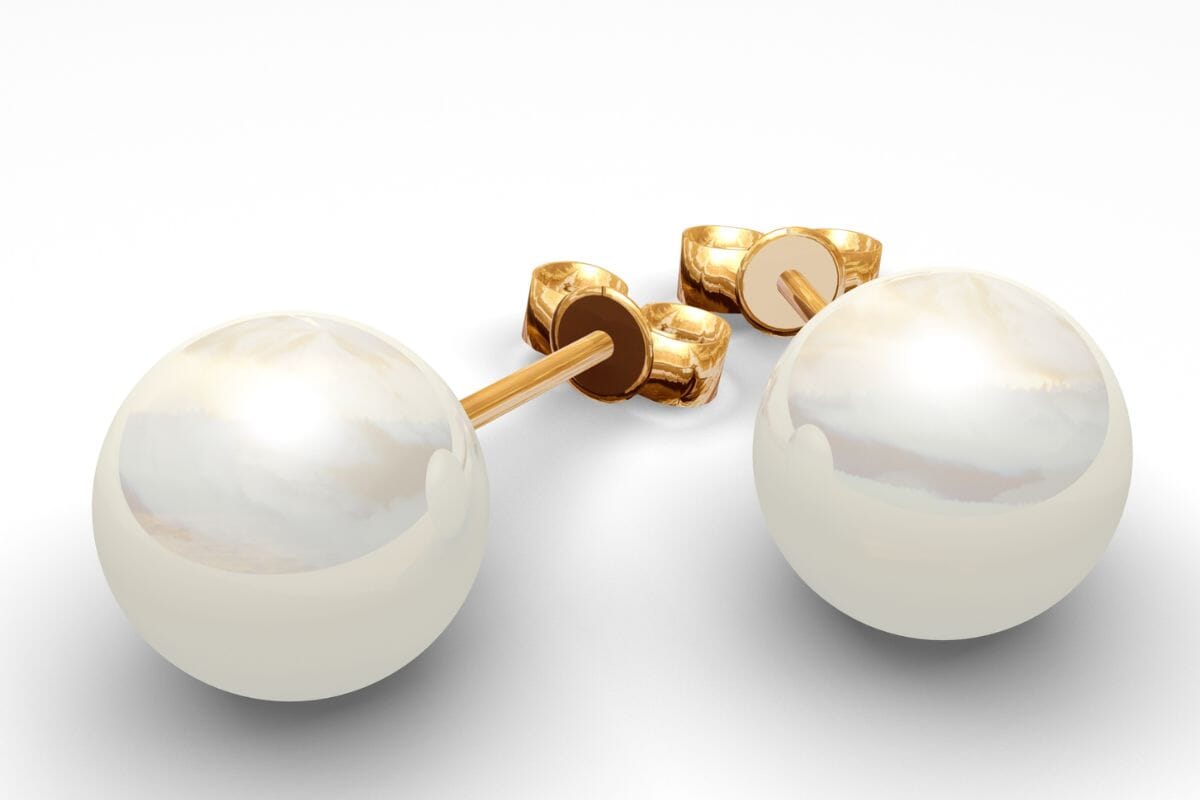
Butterfly earring backs are named for their shape, which resembles the wings of a butterfly. Typically made of metal, they slide onto the earring post and have two metal tabs that compress and expand to grip the post securely. They are favored for their ease of use and the secure hold they provide, making them a common choice for both stud and dangle earrings.
Types of Earring Backs
Besides butterfly back earrings, several other types of earring backs are available, each with unique benefits. Here's a brief overview:
- Screw back: Similar to butterfly backs but requires twisting onto the earring post, offering added security.
- Safety back: Designed with a cover that shields the earring post, preventing poking and ideal for children.
- Push back: Sometimes referred to as a friction back; it's the simplest type, using a straight post that slips into the back.
Common Issues with Butterfly Backs
While butterfly earring backs are prevalent, they aren't without potential issues. Sometimes the tabs that hold them in place can become loose, which reduces their grip on the earring post, leading to loss of earrings. On the contrary, they can become too tight, making them difficult to remove without help. Regularly checking the tension on the metal tabs can prevent these problems and ensure the longevity and comfort of wearing your butterfly back earrings.
Preparation for Removal
🦋 Gently grasp the earring with your thumb and index finger.
🔒 Hold the butterfly back firmly with your other hand.
🔄 Slowly rotate the butterfly back in a counter-clockwise direction to loosen it.
💧 If the earring is stuck, apply a small amount of lubricant or oil to the post.
✨ Once loosened, gently slide the earring out of your earlobe.
💡 Tip: Avoid pulling or yanking the earring to prevent discomfort or injury.
Before attempting to remove butterfly back earrings, I ensure all necessary tools are on hand and that both my workspace and the tools are properly disinfected. This serves to prevent any potential infections and allows for a smooth, safe removal process.
Gathering Necessary Tools
First, I gather the following items to assist me in the earring removal process:
- Tweezers: To carefully grip and slide the butterfly backs off the earring posts.
- Petroleum jelly or Olive oil: A small amount acts as a lubricant to ease the backs off without causing discomfort.
- Cotton swab or Saline solution: To clean around the earring post before attempting removal.
- Vaseline: To be applied around the earlobe for those with sensitive skin, reducing friction.
Hygiene and Disinfection
Maintaining a clean environment is crucial. Here's how I disinfect my tools and workspace:
- Rubbing Alcohol or Hydrogen Peroxide: I use either of these to thoroughly disinfect my tweezers. I soak them for at least 5 minutes or wipe them down meticulously.
- Clean Workspace: A wipe-down of my workspace with a disinfectant ensures that the area is sterile.
- Handwashing: I wash my hands with soap and water for at least 20 seconds before beginning the removal process.
- Earring and Earlobe Preparation: I gently clean around the earring post and earlobe with a cotton swab dipped in rubbing alcohol or saline solution, reducing the risk of transferring bacteria during removal.
Safe Removal Techniques

Removing butterfly back earrings can often be done at home, but it's essential to approach the task with care to prevent injury to the earlobes. I’ll guide you through the process for both a loosened and a stuck back, as well as advise when to seek professional help.
Removing a Loosened Back
When the butterfly backs are not stuck, I hold the front part of the earring with one hand. With my other hand, I gently pinch the butterfly back between my thumb and forefinger and pull it straight back away from the earlobe. For earrings that have been recently put in, I make sure I wash my hands and sanitize the earring and lobe before attempting to remove the back to prevent any potential infection.
Handling a Stuck Back
In cases where the butterfly back is stuck, I deploy more patience. I clean the area with a disinfectant solution first. If the back still won't budge, I apply a lubricant, like coconut oil, around the earring back to slide it off more easily. If that doesn’t work, I carefully use needle nose pliers to grasp the back, making sure I don’t squeeze too tight; just enough to get a firm grip to gently twist and pull the back off.
Professional Assistance for Complications
If these methods don't help and the earring back remains stuck, it's time to seek professional help from a trained piercer or even a medical professional. Attempting to force a stuck earring back can cause injury. I recognize when it's beyond my capabilities and don’t hesitate to consult someone who has the right tools and expertise to remove an earring safely without harming my ear.
Aftercare and Maintenance

Proper aftercare is crucial to prevent infection and ensure the longevity of my ear piercings. Immediate attention to the cleanliness and condition of both my skin and the earrings will aid in maintaining the integrity of the skin tissue and prevent complications.
Post-Removal Skincare
After removing my butterfly back earrings, I ensure to clean the earlobes gently yet thoroughly to prevent inflammation. I use a saline solution or a mild, non-alcoholic cleanser specifically designed for post-piercing care to wipe around the pierced area. This is especially important if my piercings are freshly pierced, as the skin tissue is still delicate and more susceptible to infection.
Maintaining Earring and Back Condition
I keep my earrings and their backs in pristine condition to prevent rust and ensure comfort. Here's how I care for them:
- Cleaning: After wearing my starter earrings, I clean them with a gentle cleanser and dry them completely before storing.
- Storage: I store my earrings in a dry place, away from humidity, which can cause rusting. I use an airtight container to keep them clean and safe.
By strictly following these care routines, I help secure not just the beauty but also the functional longevity of my earrings, all the while keeping my ears healthy and comfortable.
Troubleshooting Common Problems
😣 Problem: Butterfly back is stuck.
💡 Solution: Apply a small amount of lubricant or oil to the post to loosen the earring.
😖 Problem: Earring won't come out.
💡 Solution: Gently wiggle the earring back and forth while pulling it out to release the grip.
😫 Problem: Earring is painful to remove.
💡 Solution: Apply a warm compress to the earlobe to relax the skin before attempting to remove the earring.
🚫 Note: If you experience excessive pain or bleeding, seek professional assistance.
When removing butterfly back earrings, it's crucial to address any discomfort or complications that might arise. Below, I've outlined how to handle these issues with precision and care.
Dealing with Discomfort and Swelling
If you feel discomfort or notice swelling around your piercing, gentle pressure can facilitate the removal of butterfly back earrings. I recommend applying a clean, warm compress to the area for a few minutes to help reduce inflammation. If swelling persists or pain intensifies, it may be best to seek professional advice from a piercer or medical professional before proceeding.
What to Do in Case of Infection
In the event of an infection, removing butterfly back earrings should be done with the utmost caution. The first step is to cleanse your hands thoroughly. Then, using a sterile saline solution, gently cleanse the pierced area without removing the earring. This can help prevent further irritation. If the infection is severe, or if you're unsure about safely removing the earring, contacting customer service at the piercing studio for advice or scheduling a visit with a healthcare provider is advised.
When to Replace Earring Backs
Over time, earring backs can wear down, which can lead to complications when trying to remove them. It's important to check the integrity of your earring backs regularly and replace them if they appear loose or damaged. Always have a set of new earrings or spare earring backs on hand to avoid any issues. Additionally, with cartilage piercings, which can be more prone to complications, make sure to use earring backs that are specifically designed for this type of piercing.
Selecting the Right Earrings

When I'm considering new earrings, my top priorities are the comfort and longevity of wear, especially since I have pierced ears that can be sensitive. The backs of the earrings play a crucial role in both these aspects.
Choosing Backs for Sensitive Ears
For individuals like me with sensitive ears, the material and design of earring backs are paramount. Stud earrings with screw back designs are ideal as they tend to be gentler on the ears and reduce the risk of allergic reactions. Hypoallergenic materials like surgical stainless steel, titanium, or 14k gold are excellent choices since they are less likely to cause irritation. As a rule of thumb, I avoid nickel and brass, which are common irritants.
-
Recommended materials for sensitive ears:
- Surgical stainless steel
- Titanium
- 14k gold
-
Types of backs for sensitive ears:
- Screw backs
- Safety backs
Considering Earrings for Long-Term Use
When selecting earrings that I plan to wear regularly over a long period, I look for safety back or screw back earrings for added security. These backs ensure that my earrings stay in place throughout the day without the need for frequent adjustments. Additionally, I opt for well-crafted pieces where the connections between the earring and the back are strong and well-made, enhancing the earring's longevity while ensuring comfortable wear.
I also consider the ease with which I can remove and clean the earrings. Simple designs with secure but uncomplicated backs make hygiene maintenance effortless. Here's what I keep an eye out for:
- Criteria for long-term wear:
- Secure backings (screw or safety backs)
- Durability of material and construction
- Ease of removal for cleaning and rest
Choosing the right earrings requires attention to these details for a comfortable and lasting addition to my collection.
Contacting Support for Questions

When approaching the task of removing butterfly back earrings, it's important to know that customer service is a valuable resource. Here's how I make use of it:
Utilizing Manufacturer Customer Service
To ensure accurate and safe instructions, my first step is to reach out to the manufacturer's customer service. Here's how I proceed:
- Identify the Manufacturer: I locate the brand name on the earring's packaging or receipt.
- Contact Information: I search for the customer service details on the manufacturer's official website.
- Specific Inquiry: My call or email is clear and concise, mentioning that I need guidance on how to remove butterfly back earrings.
By following this process, I ensure that I'm getting reliable and safe information directly from the source.
Frequently Asked Questions
When it comes to removing butterfly back earrings, ensuring a gentle approach and understanding the mechanism of the earring backs can simplify the process. Here, I address some common inquiries to guide you through the removal of these types of earrings.
How do you remove butterfly back earrings if they feel stuck?
If your butterfly back earrings feel stuck, I find it best to wash your hands and then clean the earring and earlobe with a bit of rubbing alcohol to reduce friction. Next, you need to hold the front of the earring firmly, and with a gentle, steady pressure, rotate the back to loosen it before pulling it straight back.
What is the safest way to take off safety back earrings?
The safest way to remove safety back earrings is to hold the earring front securely while pushing down on the back's clasp with your fingers to release the locking mechanism. Then, I suggest pulling the back off gently so as not to harm your earlobe.
What steps should be followed to remove starter earrings from places like Claire's?
To remove starter earrings, like those you might get from Claire's, first ensure that your hands and the earring area are clean and sanitized. Grasp the front of the earring with one hand and with the other hand, carefully pull the back straight off. Avoid twisting or forcing, which could irritate your piercing.
Why are the backs of some earrings difficult to remove and how can you overcome this?
Sometimes earring backs are difficult to remove due to a tight fit or build-up of skin cells and debris. I always suggest cleaning around the piercing first. If resistance persists, applying a warm compress can help to expand the metal slightly, making it easier to remove the back.
Can you explain the proper method to take out earrings with a flat or round back?
For earrings with flat or round backings, I recommend stabilizing the front part of the earring with one hand. With your other hand, grasp the back between two fingers and apply a steady pressure pushing away from the earring post, making sure that your grip is secure to avoid dropping the back.
For first-timers, what is the proper technique to remove butterfly back earrings?
As a first-timer, it's important to handle your butterfly back earrings with care. Wash your hands thoroughly, then stabilize the front of the earring and gently squeeze the butterfly back's tabs to release it from the post. If it doesn't release easily, a slight twist after squeezing the tabs can help it glide off.
